Thick, glistening icicles hanging from the eaves might look picturesque on a winter postcard, but to anyone who understands building science, they are a flashing red warning light. Behind those frozen fringes lies a destructive force capable of loosening gutters, rotting structural framing, soaking attic insulation, and sending dirty brown meltwater pooling through bedroom ceilings.
Ice dams do not occur by accident, nor are they simply the result of heavy snowfall. They are the visible symptom of an uncomfortable mechanical truth: your home is losing heat unevenly through its upper shell, and your roof deck is fighting against the outdoor temperature. To protect your home from extensive winter water damage, you must look beyond the frozen eaves and address the thermal dynamics taking place directly beneath the shingles.
The Mechanics of How Ice Dams Form
An ice dam requires three ingredients to develop: snow on the roof, sub-freezing outdoor temperatures, and an attic warm enough to raise the upper roof surface above the freezing mark.
When interior heat leaks from living areas into an unfinished attic, it warms the underside of the roof sheathing. The snow resting directly against the warm shingles begins to melt, even while outdoor temperatures sit in the teens or twenties. This meltwater flows downward under the blanket of snow until it reaches the roof overhang, eaves, and gutters.
Because the eaves extend beyond the exterior walls of the house, they receive no heat from the living space below. As soon as the trickling meltwater hits this frigid overhang, it refreezes. Layer by layer, a ridge of solid ice builds along the edge of the roof.
Eventually, this frozen ridge forms a barrier. Newly melted snow running down from the upper roof can no longer drain away. It pools behind the ice ridge, creating an artificial reservoir of liquid water. Asphalt shingles are designed strictly as an overlapping shedding system for downward-flowing water; they are not a waterproof basin. As the backed-up water rises, it creeps backward up the slope, works its way underneath the shingles, finds the seams in the plywood decking, and penetrates the interior of the home.
The Destructive Ripple Effect of Trapped Meltwater
The damage caused by ice dams rarely stops at a few damp ceiling spots. When water backs up behind an ice ridge, it exploits every nail hole and decking seam in its path.
Inside the attic, that moisture saturates fiberglass or cellulose insulation. Wet insulation loses almost all of its thermal resistance, which accelerates attic warming and creates an even larger, faster-forming ice dam. Over time, recurring moisture rots rafters, trusses, and roof sheathing, compromising the structural integrity of the roof system.
As water travels downward through wall cavities, it breeds hidden colonies of mold and mildew within drywall and framing bays. Peeling paint, warped floorboards, and water-stained drywall are usually the final clues in an already advanced degradation process. Outside, the sheer physical weight of the solid ice dam frequently pulls aluminum gutters away from the fascia, bending fasteners and leaving the roofline vulnerable to spring rain runoff.
Knee-Jerk Fixes That Cause More Harm Than Good
When homeowners wake up to water dripping into their living room, panic often sets in. Unfortunately, the most intuitive emergency reactions usually cause more damage than the ice dam itself.
Taking a hammer, hatchet, or crowbar to the roof edge is one of the quickest ways to ruin your roof. In freezing weather, asphalt shingles become brittle and glassy. Striking the ice with a metal tool will shatter shingles, punch holes directly through the roof deck, and slice through flashing.
Spreading ordinary rock salt onto the roof is another widespread mistake. Rock salt is sodium chloride, a compound that corrodes metal gutters, degrades roofing adhesives, and strips protective granules from asphalt shingles. Furthermore, when the salty runoff finally drains, it poisons foundation shrubs and lawn grass below.
Relying exclusively on electric de-icing cables is also a flawed strategy. While zig-zag heat cables create narrow melt channels to let water escape, they are an energy-hungry band-aid rather than a solution. If installed improperly, they often shift the freeze line further up the slope, creating secondary ice dams above the heated wire zone while leaving the underlying thermal defects untouched.
Managing an Active Ice Dam Safely
If an ice dam has already taken hold and water is actively threatening your living space, you need emergency intervention that mitigates risk without ruining roofing materials.
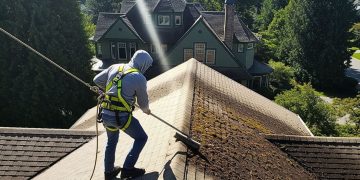
Your primary immediate defense is removing the fuel source. Use an extendable roof rake from the ground to pull snow off the lower four to six feet of your roof slope. Stand well clear of falling snow and ice, and pull downward in gentle, controlled strokes. Leaving a couple of inches of snow is fine; the objective is to relieve the weight and eliminate the insulating blanket that keeps the upper roof deck warm. Never climb onto an icy roof with a shovel.
If water is actively backing up and finding its way inside, create relief channels using calcium chloride, not rock salt. Fill long nylon stockings or breathable burlap sleeves with calcium chloride pellets and lay them vertically across the ice dam, perpendicular to the gutter line, with the tail hanging slightly over the edge. The chemical dissolves gradually, cutting a clean vertical trough through the ice barrier and allowing trapped water to drain harmlessly into the downspout.
For severe, massive dams that resist basic treatment, hire a professional roofing contractor equipped with a low-pressure steam machine. Professional steamers use high-temperature, low-pressure steam to slice through dense ice blocks like a hot knife through butter. Ensure the contractor uses a dedicated steam system rather than a hot-water pressure washer, as high-pressure water jets will strip away asphalt granules and void your shingle warranty.
The Permanent Fix: Treating the Problem from the Inside
The only lasting way to stop ice dams is to eliminate the thermal imbalance that creates them. A cold roof deck does not melt snow prematurely, meaning water never trickles down to refreeze at the eaves. Achieving a consistently cold roof requires addressing three interconnected elements inside the attic.
Sealing Thermal Bypasses
Most people assume attic insulation is the primary barrier against heat loss, but warm air leakage through unsealed openings often moves far more heat than conduction through insulation. These convective openings are known as thermal bypasses.
Common culprits include the perimeter around chimney chases, open soffits over kitchen cabinets, gaps around plumbing vent pipes, unsealed electrical junction boxes, and recessed ceiling lights. Standard can lights operate like miniature chimneys, funneling household heat directly into the space beneath the roof deck.
Before adding new insulation, seal these bypasses thoroughly. Use expanding polyurethane foam, fire-rated caulk, and sheet metal flashing around chimneys and flues to close off every air leakage point between the conditioned living space and the unconditioned attic. The attic access hatch or drop-down stair should also be weatherstripped and fitted with an insulated cover box.
Upgrading Attic Insulation
Once air leaks are sealed, ensure the attic floor has enough insulation to keep heat where it belongs. In cold winter climates, modern building practices recommend insulating attic floors to a value between R-49 and R-60, which translates to roughly 16 to 20 inches of blown-in cellulose or loose-fill fiberglass.
Consistent coverage is vital. Ensure insulation extends all the way over the exterior wall top plates without pinching down or blocking the incoming airflow from the eaves. If your heating and cooling ductwork runs through an unconditioned attic, seal all sheet metal joints with mastic tape and wrap the ducts in thick foil-faced insulation. Better yet, consider sealing and insulating the entire attic envelope if ductwork cannot be relocated.
Restoring Balanced Attic Ventilation
Even a well-insulated attic absorbs some stray heat. Effective roof ventilation flushes that lingering warmth out and replaces it with cold outside air, keeping the roof deck uniform in temperature.
A balanced ventilation system relies on natural convection: cold air enters through continuous soffit vents at the low point of the eaves, sweeps upward along the underside of the roof sheathing, and exits through a continuous ridge vent along the roof peak.
To keep this airflow open, install rigid plastic or foam rafter baffles, also called insulation wind baffles, in every rafter bay at the eaves. These baffles physically prevent blown insulation from sliding down and blocking soffit intake vents, ensuring cold outdoor air always has a clear path upward. Avoid mixing different types of exhaust vents, such as pairing gable vents with a ridge vent, as this disrupts the natural intake-exhaust cycle and leaves pockets of hot air trapped near the roof deck.
Defensive Strategies for Your Next Roof Replacement
If your roof is approaching the end of its natural lifespan, you have an ideal opportunity to build advanced physical protection into the structure.
Modern building codes mandate the installation of a self-adhering, rubberized-asphalt membrane along the eaves in ice-prone regions. Often called an ice and water protector, this peel-and-stick underlayment seals tightly around roofing nails. When water backs up behind an inevitable winter freeze, the membrane prevents moisture from reaching the wood decking.
For optimal defense, specify that this membrane extends from the edge of the roof overhang to a point at least 24 inches inside the interior line of the exterior wall. On shallow-pitch roofs or in areas subject to severe blizzards, extending that protection three to six feet up the slope, as well as throughout all valleys, along dormer sidewalls, and around skylights, provides an essential secondary line of defense against catastrophic leaks.
Protecting a home against ice dams is ultimately an exercise in thermal discipline. By sealing ceiling bypasses, buffering the attic floor with deep insulation, keeping intake vents clear, and outfitting roof edges with waterproof membranes, you strip winter weather of its destructive leverage. The icicles disappear, the roof stays cold, and the interior stays dry no matter how deep the snow piles up outside.